Recipe Index

Vegan Chocolate Cherry Tart

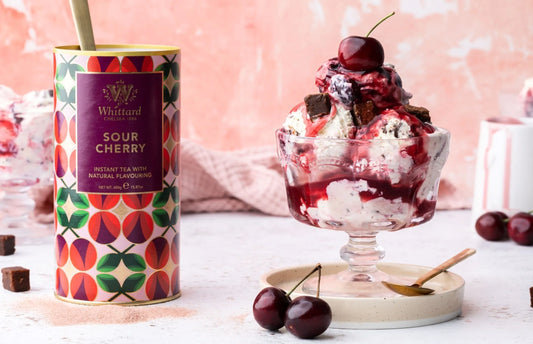
Chocolate Cherry Mousse

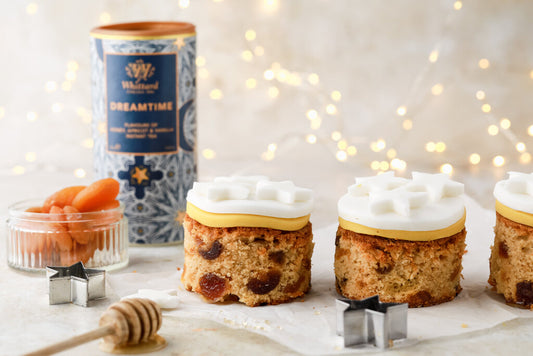
Chocolate Cherry Bombs

Chocolate Cherry Brownie Cupcakes
Vegan Chocolate Cherry Tart

|
Prep Time |
 |
Difficuty |
 |
Serves |
There’s a lot of heart to the perfect tart. How do we know? Nadia from Nadia’s Healthy Kitchen has created a vegan wonder that is made with a whole lot of love (oh, and the help of our Chocolate Cherry Brownie hot chocolate!)
INGREDIENTS
- 320g ready rolled short crust pastry
- 150g cherry jam
- 235ml coconut milk
- 100g dark chocolate
- 4 heaped tbsp Chocolate Cherry Brownie Hot Chocolate
METHOD
- Preheat your oven to 200C/180C/350F
- Unroll the pastry to line a 36 x 12cm rectangle loose base pan. Line the pastry with baking paper and fill with baking beans.
- Bake for 20 minutes, then remove the paper and beans and cook for another 5-10 minutes.
- Leave to cool completely, then evenly spread the cherry jam.
- Meanwhile make the chocolate filling - break up the chocolate and add it to a saucepan along with the coconut milk and hot chocolate mix. Heat on a low-medium heat stirring continuously until the mixture is completely melted and smooth. Take off the heat and pour over the jam, then leave to cool for 10 minutes before moving to the fridge to chill for 4 hours or overnight.
- Decorate with some melted chocolate and fresh cherries. Voila!
Chocolate Cherry Mousse

|
Prep Time |
|
Difficuty |
|
Serves |
Show someone you care with this mouth-watering mousse from Hungry Anja (@hungryanja). Super easy to whip up, with deliciously decadent results that are sure to impress.
INGREDIENTS
- 3tbsp cornflour
- 60g Chocolate Cherry Brownie hot chocolate
- 500ml whole milk*
- 30g dark chocolate
- 1 tbsp sugar
- 1 tbsp butter
- Soft peaks whipped cream, grated chocolate, and dry rose petals for serving
- *if you want to make it vegan use plant milk, vegan butter and top with whipped coconut cream
METHOD
- In medium saucepan combine sugar, Chocolate Cherry Brownie hot chocolate, cornflour with a whisk. Add milk and continue to whisk continuously.
- Heat to simmer over medium heat. Add dark chocolate to the pudding mixture. When it starts to bubble, lower the heat and whisk for 30-60sec until it thickens.
- Remove from heat and add butter to make your pudding glossier and richer.
- Pour into your favourite dessert glasses, cover each with cling film foil to prevent tops forming a skin while cooling.
- Chill in the fridge for 2-3 hours or overnight.
- Serve with sweetened whipped cream, grated chocolate and dry rose petals (for that extra touch of luxury) and treat yourself and your loved ones to the best chocolate pudding you’ve ever had.
Chocolate Cherry Bombs

|
Prep Time |
|
Difficuty |
|
Serves |
Like little bundles of joy! The Little Blog of Vegan has done it again with their Chocolate Cherry Bombs - made to shimmer, sparkle and put you in the mood for L-O-V-E.
INGREDIENTS
- 150g of dairy-free white chocolate
- Pink food gel
- 20g of dairy-free dark chocolate chips
- Vegan marshmallows
- Chocolate Cherry Brownie Hot Chocolate
- 200ml milk/dairy alternative
- Decorations (optional)
- Freeze-dried raspberries
- Edible glitter
* Pipe some of the melted chocolate around the rim of your serving glass and press on freeze-dried raspberries.
METHOD
- Finely chop the white chocolate and place 3/4 of it into a heatproof bowl along with a tiny drop of pink food gel. Too much food gel can make the chocolate solidify, so be careful. If this does happen, add a tiny bit of coconut oil to loosen the mixture.
- Create a Bain-Marie to melt your chocolate over a low heat. Temper your chocolate. Check out this tutorial video to show you how.
- Using a food-grade brush, brush a thin layer of tempered chocolate into silicone moulds then place into the freezer for 5 minutes.
- Paint a second coat of chocolate over the first and pop into the freezer for 5 minutes.
- Remove the chocolate hearts out of the moulds. They'll be shiny and firm to touch. Fill half of the hearts with 2 teaspoons of Chocolate Cherry Brownie hot chocolate, a small handful of mini vegan marshmallows and a couple of dairy-free dark chocolate chips.
- Pipe or dip some melted chocolate around the rim of the chocolate hearts and attach the second heart on top, pressing together gently to seal in the fillings.
- Add some of the melted chocolate into a piping bag, snip off the tip and drizzle over half of the heart then decorate with a sprinkling of hot chocolate powder, freeze fried raspberries and a dusting of edible glitter (decorations are optional).
- To make your hot chocolate, heat your dairy free milk. Pour into heatproof mugs and drop in the chocolate bomb, then watch it explode with marshmallows and hot chocolate powder.
- Stir with a spoon to combine everything into a smooth drink – delicious!
(Oh, and be sure to store the chocolate bombs in the fridge afterwards!)
Shop the Recipe CHOCOLATE |
Where to Next? SHOP HOT CHOCOLATE |
Chocolate Cherry Brownie Cupcakes

|
Prep Time |
|
Difficuty |
|
Serves |
The sweetest of treats from blogger extraordinaire, My Kitchen Drawer, as she introduces us to rich chocolate brownies, topped with cherry buttercream and chocolate dipped cherry. Delish.
INGREDIENTS
- 110g butter melted
- 150g caster sugar
- 2 eggs
- 3 tbsp cocoa powder
- 2 tbsp Whittard Chocolate Cherry Brownie Hot Chocolate
- 1 tsp vanilla extract
- 120 ml milk
- 3/4 tsp baking powder
- 1 tsp salt
- 170g plain flour
- 12 tsp cherry jam
- 150g butter softened
- 300g icing sugar
- 2 tbsp cherry jam
- 12 fresh cherries
- 100g dark chocolate melted
METHOD
- Line a cupcake tray with cupcake liners and preheat your oven to 170C
- Add the butter and sugar to a bowl and mix until well combined.
- Beat in the eggs, milk and vanilla.
- In a separate bowl mix together the flour, baking powder, salt, cocoa powder and hot chocolate, mix well.
- Pour the flour mixture into the wet ingredients bowl and fold it through to form a smooth batter.
- Split the mixture evenly between the cupcake cases and bake for 20 minutes.
- While its baking melt your dark chocolate in a bowl, then dip your 12 cherries into the melted chocolate and leave on baking paper to set. Leave to one side.
- Once cooled, add a spoonful of cherry jam to the middle of each cupcake.
- Beat the butter and icing sugar together until smooth and fluffy then add the cherry jam and fold it through until the buttercream is tinted pink
- Fill a piping bag with your buttercream and pipe buttercream swirls onto your cupcakes then top each cupcake with a chocolate dipped cherry.